|

| Print this page - use Landscape |
Search the WeetHet Pages |
|||||||||||||||||
| WeetHet is being updated! - Current articles will slowly move to www.tweaking4all.com For excellent webhosting that is reliable and affordable, we highly recommend: LiquidWeb |
||||||||||||||||||
|
On this page ...
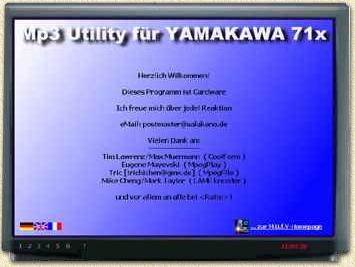
A little Introduction M.U.F.Y. is an acroniem for MP3 Utility For Yamakawa. The current version supports multiple languages, like German, Dutch and English. You can download version
1.01 here, or just download the
language module. Some features of M.U.F.Y.:
Downsides of M.U.F.Y.:
Starting M.U.F.Y. Let's unzip the downloaded file using WinZip
to a seperate directory. Two items will appear now, the "TV-set" and the "remote control" of M.U.F.Y.;
In the lower right corner of the "TV" you'll find a button to open the M.U.F.Y.-homepage. In the lower left corner one can select the GUI language. M.U.F.Y. Remote control The functions of the M.U.F.Y. remote;
Option 1: M.U.F.Y. Settings The next step is to set your settings properly, using option "1" either by clicking it on the remote or on the TV. Note: A little hidden, but there is a browse button ("...") next to the directory fields. Here you will have to set: "Source MP3" - Where are the MP3's
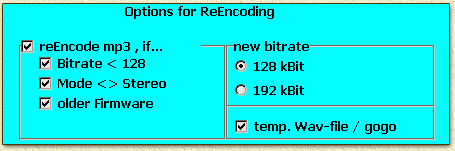
located ? Do you personal settings mow. I prefer to put my MP3's and .BIN/.TXT files in the same directory. Temp files I do store in "C:\Windows\TEMP". This is just my preference, do what ever suits you. Click "OK" if all settings are done, select "OOPS" to undo changes. Option 2: MP3's Re-encoding Sometimes an MP3 is not in the formate you want it to be. Here option 2 comes in action. More details on compression, ratios etc on MP3's you can find on the MP3 Introduction page. Note: this functionality does not offer to much advantages, so you probably will not be using it to often. Click the "Options"-button for detailed settings;
Click "START" to start the re-encoding of the files that match the criteria set in options. Note: Converting bad MP3's to a better format will not improve quality, specifically in these situations;
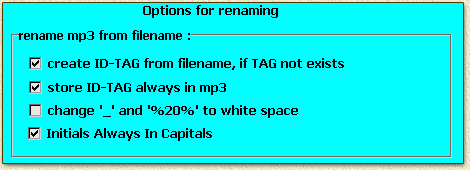
Option 3: Rename using ID-Tag
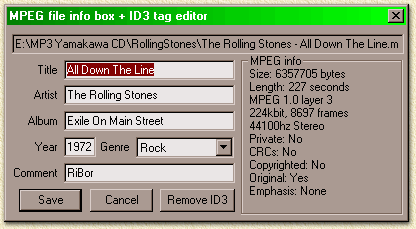
MP3's support so called ID-Tag. These "tags" include facts like title, artist, albumname, etc. Based on this tag, M.U.F.Y. can rename MP3's to filenames of this format: "ARTIST - TITLE.MP3". An example MP3-ID-Tag:
This snapshot of WinAmp speaks for itself I guess.
Click "OPTIONS" to make the proper settings;
Note: the option "Change '_' and '%20%' to white space" converts each underscore ("_") and each "%20" to a normal space. Underscores are comonly used in Unix environments, while the "%20" is an Internet expression for a space. Doing so improves readability. An conversion example:
You see the difference right away ... Note: Your "Source MP3" at TV-option 1 is not properly set if the list remains empty! M.U.F.Y. is not capable of searching sub-directories ! Option 4: Image settings
This option, combined with option 5, displays the settings of the background image for your MP3 CD. Here you also find the "START" button which you can use to start the conversion proces. Before you do so, please make sure the settings at option 5 are correctly. Option 5: Edit images settings
At option 5 you can change image settings like: - title font (size, type, color)
When done editing the page layout, you can click "START" at option 4. M.U.F.Y. will generate the requered files. Option 6: Generating batch files This option helps you generate batch files for DOS, which can save a lot of work when renaming a lot of files. The final step: Burning the CD Use your favorite CD-writer software to create the MP3 CD. Note: For the actual burning of an MP3 CDROM, read the page "How to burn my own computer (data) CDROM using Nero". |
||||||||||||||||||