| Print this page - use Landscape |
Search the WeetHet Pages |
|||
| WeetHet is being updated! - Current articles will slowly move to www.tweaking4all.com For excellent webhosting that is reliable and affordable, we highly recommend: LiquidWeb |
||||
|
On this page...
STEP1: software setup Before we can start, we do need to install DVDx,
Cinema Craft and the Video Server Plugin.
Optionally you can first read the article on how Video Server Plugin works. Since the "ripper" in DVDx is not always running perfect, I really would like to advise you to use Smartripper for ripping the DVD to harddisk.
To "help" decryption of a DVD, we need to "unlock" the DVDRom first - Just play a piece of the film using any DVD player application, for example PowerDVD. Looking at the DVD menu is NOT sufficient, you must really take a look at a part of the movie (a few seconds will do)! Close the DVD-playbak application. You can now either use SmartRipper or the buildin ripper of DVDx.
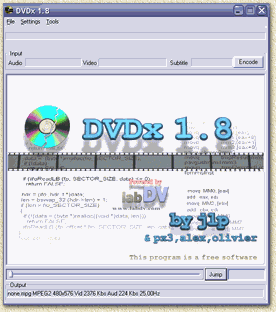
Step 2: Start DVDx Double click the DVDx icon in the Windows Start menu.
Step 3: Open the DVD Now there are two way to proceed:
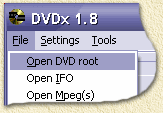
From the "File" menu, choose the option
"Open DVD root" if you're going to have DVDx to
do all the work.
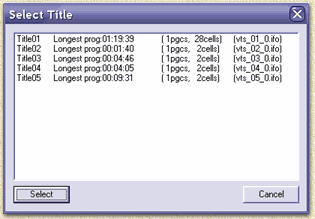
A dialig appears where we can select the desired video-track.
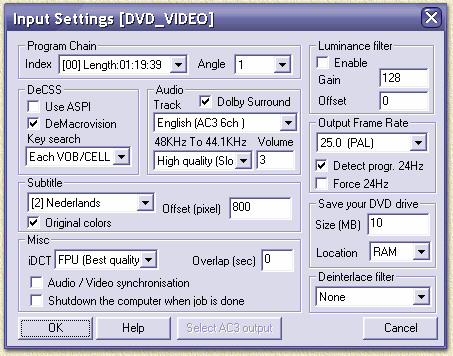
Usually, the longest videotrack is the main movie. Select it and click the "Select" button. Step 4: Video Input Settings After selecting a video-track, we must now do some settings on the Video Input options. Below you see a screenshot of me working with a Regio 2 PAL movie, using the subtitles:
For detailed info on these options, see the DVDx settings into detail - Video Input Settings. In short: Choose the right language for audio (Audio-Track), indicate if you would like to use the subtitles (SubTitle) and set the proper frame-rate (PAL:25fps, NTSC:29.97). Once you're done doing the settings, click "OK" to continue. StEp 5: Video Output settings You've now returned to the basic DVDx screen. We now see the resolution of the original movie and the playtime of thye movie speelduur. Both numbers are needed later on. Tip: You will find more info on the page "Video formats".
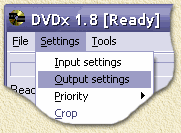
From the menu "Settings" choose "Output settings":
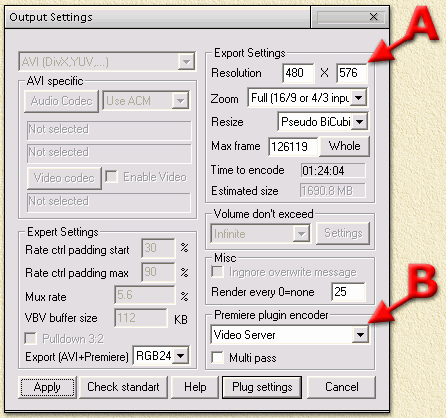
The output-settings window appears:
Caution: pay attention as of this point ! A:
Setting the videoformat. In a nutshell: copy the settings from the screenshot above and click the "Whole" button (indicating that we want to rip the entire movie). Since DVDx (yes even 2.0) seems to be having trouble with the last few frames, I recommend decreasing the number of frames with app. 100 to 200 frames! The WeetHet bitrate calculator is not required for this example as the Video Server Plugin comes with a buildin bitrate calculator. B:
Plugin activation and configuration.
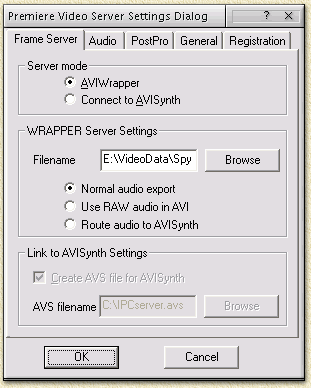
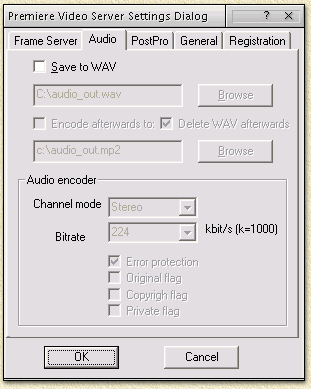
Once more: copy these settings. At the field "Filename" one has to click the "Browse" button, so one can set the location of the generated "temporary" file (usually 20 to 50 Mb in size). The filename doesn't really matter, as long as it ends with the extension ".AVI". REMEMBER THE FILENAME THOUGH! Now click the "Audio"-tab. And copy these settings:
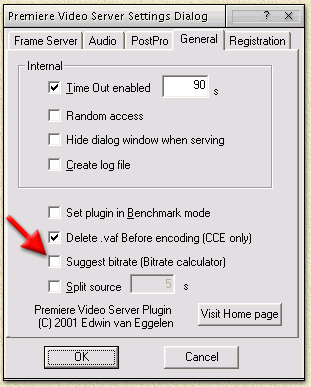
First we go to the "General" tab now, as the "PostPro" tab is a bit more complex (we'll deal with that later).
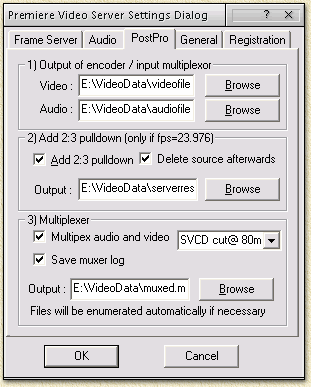
Once more: copy these settings. Optional: Check "Suggest bitrate (Bitrate calculator)" if you would like to use the buildin bitrate calculator. use the "Registration" to enter your registration code if you sponsored the Video Server Plugin. If not: continue working. OK, now the tab "PostPro". Like I said a bit more complex: SITUATIon 1: CCE Lite, an old CCE or using MULTIPASS When you use:
In these 3 situation we do need to make a separate Audio and Video file. Video Server can mux (merge) these for you when finished, and even cut it into the right sized pieces for VideoCD or SuperVideoCD. Copy these settings:
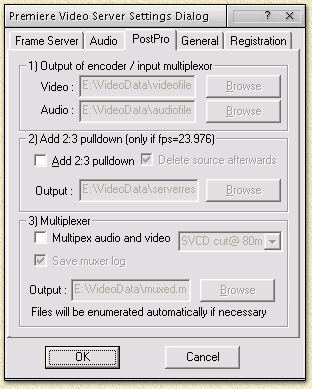
Once again: filenames are up to you. NOTE! Situation 2: CCE 2.64SP or newer When using Cinema Craft Encoder SP or Pro, version 2.64 or newer, then we can do all this in one single pass. Copy these settings:
NOTE!
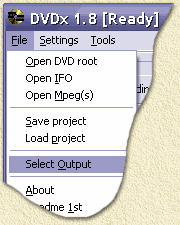
StEp 6: Start conversiON From the "File" menu, choose "Select Output". Here we can set the filename of the endresult.
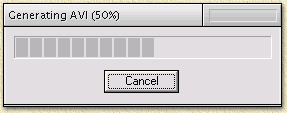
When clicking on the "Browse" you can choose the location and filename of the MPEG file(s). You don't need to add the .MPG extension. Click "OK" when done. You're back again to the DVDx main window. In the upper right corner you will see a button called "Encode". This will start conversion - click it now. The Video Server Plugin will now awake and will start to create the temporary AVI file:
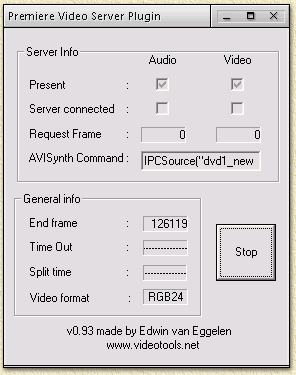
As soon as the file is create, this window appears:
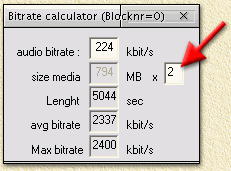
When you checked the "Suggest Bitrate" option, you now might be wondering where the h*ll the calculator is. Well, it's kind-a hidden behind the previous window:
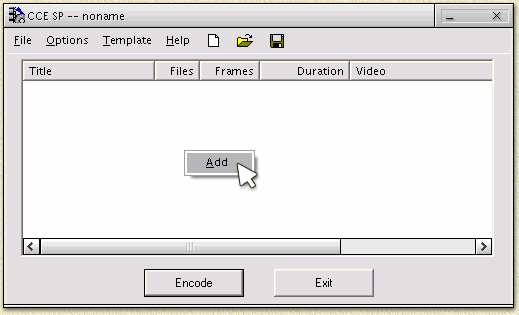
Here you can set the desired audio bitrate, the size of a CD (fixed here because I did set, on the Frame Server pagina, "SVCD Cut@ 80min") and the number of CD's you wish to use. Here I use 2 CD's. The calculator now shows the suggested average bitrate of 2337 Kbps. Once you noted this bitrate, you can close this window. Start Cinema Craft Encoder (standalone) Start CCE. Click with the right mouse button on the white space and slect the upcoming optio "Add".
A filedialog appears. Now search for the AVI fiel we defined in the "Frame Server" tab of Video Server Plugin (Didn't I tell you to remember this filename?!). After adding the file, we see:
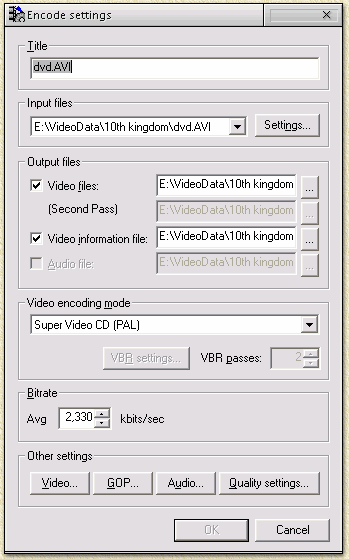
Here we see that this particular movie has a playback time of 1 hour and 24 minutes, and the bitrate used for sending data to CCE: 6000 kbps (the bitrate of the originale DVD movie). We need to tell CCE now to convert this bitrate. Right click the added filename and choose "Edit...".
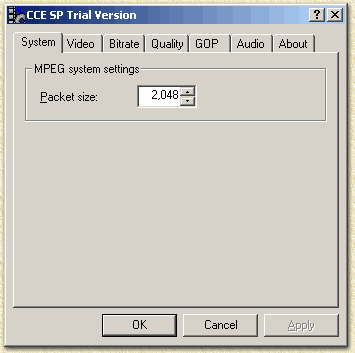
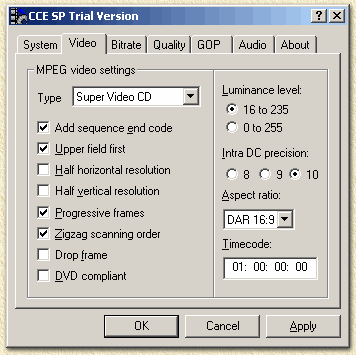
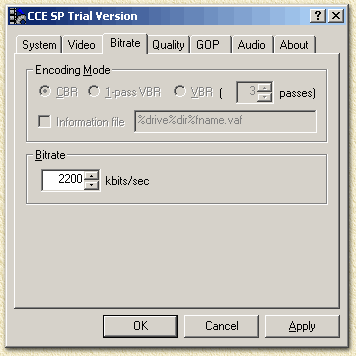
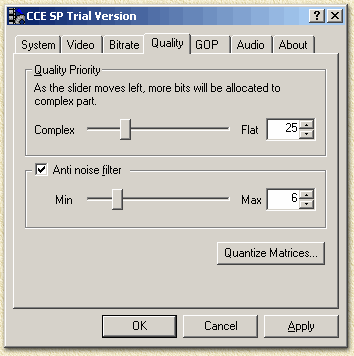
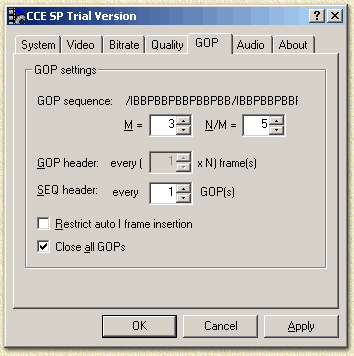
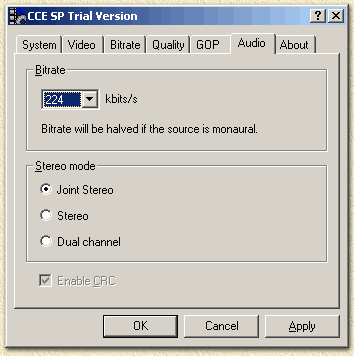
As you can see, I choose "Super Video CD (PAL)". Tip: If this setting is disabled, then you did set a wrong resolution in DVDx! If the option does not appear at all, then your version of CCE does not seem to support this. Click"Video". The configuration window of Cinema Craft Encoder appears. Copy these settings for a 16:9 PAL film. Note that screens might differ for each and every version of CCE!
Note:
Note:
Note: I prefer a high quality picture so I always set "Complex" ("Image Quality Priority" with other CCE versions) to 40. Note: Do not change the "Quantize Matrices" settings.
Note: Naturally you can use other values for the audio bitrate, ie. 224 or 192 kbits/s are valid values. However I stick to a minimum of 224 Kbps (quality). Click OK twice until you're back in the
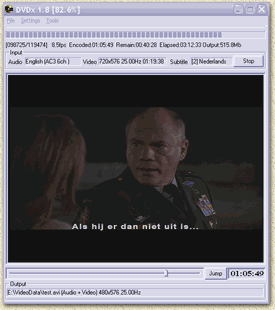
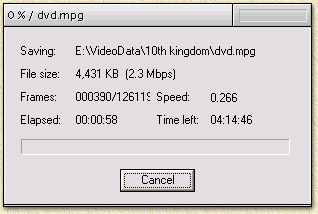
Cinema Craft main window. Now click "Encode". StEp 7: WAITING ... We now have to wait and amuse our selves for a while, as the encoding proces will take quite some time. Below you will see some screenshots of the ongoing proces. In this example it took a little bit less than 4 uur to convert a 80 minutes movie with Cinemae Craft Encoder. (AMD Athlon 1300 Mhz machine).
Tip: MPEG2 cannot usually be played with Windows Media player. Either install a DVD player (ie. PowerDVD) or an MPEG2 codec (usually comes with the DVD player). Tip: DVDx 1.8 chooses to crash every now and then in the process, rather use (the very ugly looking) DVDx 2.0. |
||||


