|

| Print this page - use Landscape |
Search the WeetHet Pages |
|||||||
| WeetHet is being updated! - Current articles will slowly move to www.tweaking4all.com For excellent webhosting that is reliable and affordable, we highly recommend: LiquidWeb |
||||||||
|
On this page ...
Overview Mounting a Satellite reception dish for the Astra (Eutel/Hotbird works similar)
I found this the hardest part of the start of Internet by Satellite. It's not an easy task to mount and aim the dish. I personally had to call a friend to get some help (thanks Frank!), so if you can: call someone who has done this before or call your dealer if you're not sure you want to do this. Some brief information about mounting a dish:
Why a double or quadriple LNB ? Well, usually these are not that expensive but offer more fun. One can hook up 2 receivers or a receiver and a DVB-card (for Internet by Satellite) etc... for a few extra bucks you get a lot more out of that single dish ! As I already told you: see if you an find some help
from a friend or a dealer if you're not sure if you can do this by yourself
... I had a friend helping me too ... so don't feel ashamed. Step 1: Where to put that dish? Before we can place a dish, we must know where the Astra satellite can be found, so we can aim for the right satellite. For the Netherlands, there is an easy trick (other countries may differ). Coverage details can be found here. Take a look at the sky around 12:45 in the beginning
of the afternoon (GMT+1, summertime) and locate the sun. The sun is now
approximately at the same location as the Astra.
The exact location of the Astra is 19,2° east in relation to the south. For users of a compass this should be a piece of cake. I have to admit that I'm not familiar with the use of a compass, I just used the normal "sun"-trick. It's less acurate but very simple. If you like to explain to me how to handle a compass then please mail me ! Also a good trick: take a look at your neighbours dish (if they have one) - it will give you a pretty good idea where to aim for. Some important dish parts:
You can place the dish anywhere, where the dish has a free line of sight. No object, like a house or a tree, should be blocking the sight from the dish to the Astra satellite ! Make sure the dish is mounted stable ! A moving dish will interfere with reception quality ! Note: The antenna cable should not exceed a length of 30 meters ! Keep this in mind when looking for a location for the dish. Note: mounting the dish on a wall is the most secure/stable way to mount a dish. Before you continue: now is the time to mount the satellite reception dish. Step 2: Vertical tilt/offset of the dish ? In this situation we mean by this the backwards leaning of the dish. In the chart below you have to locate your position and read the indication on the right to see the degrees for tilting the dish. In my situation, living in the south of the Netherlands, I must position my dish between 29° and 30°, so I'll start by using a 29,5° vertical tilt.
The A marked box in the picture above, is zoomed in the picture below:
Here we see an 29,5° vertical tilt of the dish ... Step 3: Hooking up the receiver ... We can now hookup the equipment. This can be a regular satellite receiver of for example a DVB-card for your PC (suitable for satellite reception). It doens't really matter what you choose to use, as long as it is capable of displaying the reception signal strength. We will need this for the fine tuning later on. In the manual of your equipment you will find how it's
all to be connected. The antenna cable goes from the LNB to the SAT-receiver. A TV-satellite-receiver is hooked up to the TV-set and
a DVB-card is located in your computer. WARNING: Do not yet connect the power to either of the devices ! Incase you're using a TV-SAT-receiver, you can now connect the TV and plugin the powercord. Now switch your TV on and set it to the AV-channel. Usually this is channel zero, E-channel, E1-channel or simply the A/V-channel (you should be using the SCART or seperate A/V cables for this to work). On most remote controls the A/V-channel is recognized by a little arrow with a small box drawn around it. Now plugin the powercord of the Satellite-receiver and
switch it on. Now set either the TV-SAT-receiver or the DVB-card software, to signal-strength indicator. This is different for each receiver, so you will have to look in the manual for details. For example, the Technotrend look-a-like DVB-cards indicate signal strength by starting the DVBData-application, or (if the application is already running) by double clicking the DVB logo in the systray (where Windows also runs it's systemclock). When you're using a Strong SRT8000 satellite-receiver you can use the remote control and press "menu", "7" and "1". A statusbar will appear, if everything is prefect, the full bar will be display and will be green. Ofcourse this will very likely not be the case, that's why we will do some fine-tuning in the next step. We will now start turning the dish with very small steps in a horizontal direction (ie. left or right - Azimuth). Note that sitting in front of the dish or toutching the dish will influence the quality of reception! Start (for example) by truning it a very little step to the left. Wait 5 seconds and check the signal indicator of the receiver or DVB-software. If the signal appears to decrease: turn the dish the otherway around in small steps again, until the signal is at it's maximum. This does not need to be the full bar ! Next we will change the vertical tilt (leaning more or less backwards of the dish). We use the same procedure here as before: use little steps and start working in one direction until signal lower. You're done when the signal indicator bar will not become any better (a full 100% is almost impossible!). An indicator (here DVB-card software
shown): Note: a 100% signal strength will be very
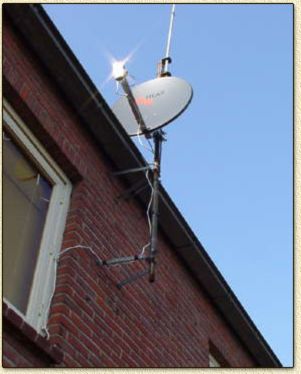
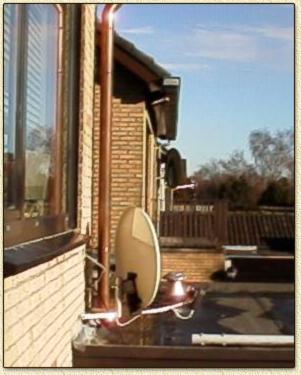
unlikely to get. Often 70% will do just fine for a good reception. And this is what it looks like (my dish and the dish of Frank):
|
||||||||