|

| Print this page - use Landscape |
Search the WeetHet Pages |
|||||||||||||
| WeetHet is being updated! - Current articles will slowly move to www.tweaking4all.com For excellent webhosting that is reliable and affordable, we highly recommend: LiquidWeb |
||||||||||||||
|
On this page...
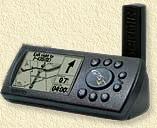
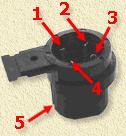
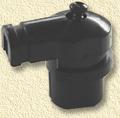
Below you will find the connector pinout of the round Garmin connector. It is being used with the Garmin 12, 12xl, 38, 40, 45, 48, 76, 89, 90, 92, 176, 295, GPS II, II+, III, III+, V and Street Pilot.
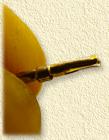
You will need this info to hook your eTrex to a PDA or PC. The pin layout is as shown below, please note the notch at (5). To the left of this notch (solder side) you will find pin 4. To the right pin 1.
Tip: If you're busy with an Garmin connector anyways then you might want to consider adding external power for the eTrex aswell. Use a 3V powersupply and connect it to pin 4 (+) and 2 (-) of the connector. pFranc Assembly The pFranc-connector is a do-it-yourself kit.
In the little bag, you will find three
3 plastic parts, a screw and 4 pins attached to a piece of metal.
After doing that, you can place the pins in the cilinder piece of plastic with 5 holes in it. We will not use the centre hole as it will be used later for the screw.
Onces you placed the four pins, you can add the little round pice of plastic that has 9 holes on top of the pins.
Now we can solder the wires to the pins. Be carefull to not use to much heat here as the plastic parts might melt! Consider using a soldering iron with a fine tip!
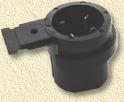
TIP: Since you're busy on the Garmin plug anyway, consider writing down which pin is connected to which wire. If you're not sure which is which, then please take a look at the image at the top of this page. Once you completed the soldering, you can add the last plastic part, the little cap.
Finally place the screw in the opening of the cap; Don't use excesive force when tightening the screw ... :-) |
||||||||||||||