|

| Print this page - use Landscape |
Search the WeetHet Pages |
|||
| WeetHet is being updated! - Current articles will slowly move to www.tweaking4all.com For excellent webhosting that is reliable and affordable, we highly recommend: LiquidWeb |
||||
|
On this page ...
Before you start ...
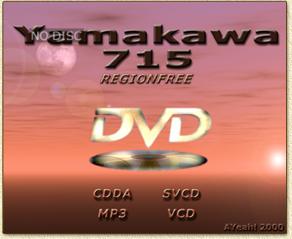
There is a neat trick to change this image to a drawing
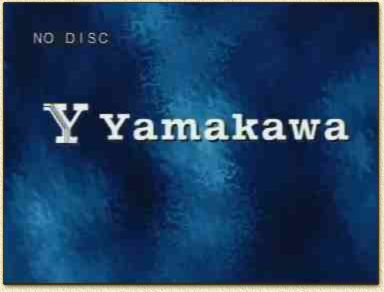
you made, for example, with Photoshop. Details for updating your firmware and risks that come with that ares explained on the Yamakawa Firmware Update page. Note: you will need a firmware rom file and a firmware password file. Download version 3H here. Step 1; Get the right files For injecting a new image in the rom file, you will need a tool to help you with that. YST is such a tool, download version 0.99a here. Unfortunally the YST homehape is dead,... so this is it ... You will also need, as mentioned before, the ROM files, download version 3H here. You can also visit the Yamakawa Firmware Update page to find out what I'm talking about and where to get different versions. Step 2; Create a drawing You will now need a bitmap/image with the dimensions 704 x 576. The image can be 24 bits in depth. You can draw this in your favorite drawing program like Photoshop, Corel PhotoPaint, MSPaint, etc. Save the image as a BMP, make sure you do not use RLE compression. This is the image I used for testing, click on it to download the zipped image;
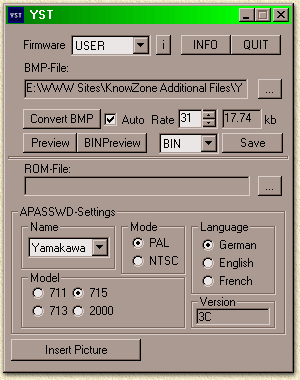
Step 3; Get image and convert it Now we start the YST tool which you just downloaded. If you didn't do so yet, please unzip the file, for example using WinZip. Double click the "YST099a.exe" icon to start YST.
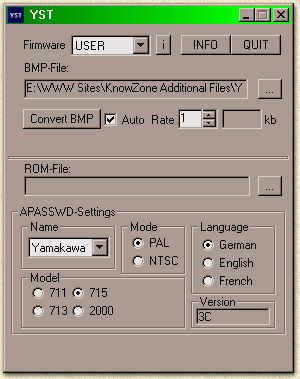
First we set the "Firmware" to "USER". Next we select the BMP image we created in step 2 uding the "..." button next to "BMP-File". Now you check "Auto" and set "Rate" to "1".
Depending on the complexity of the source BMP image it can take a while (I have seen "18" and "31" in the "Rate" field). If you used a wrong file format, an error will occure.
You can use "Preview" to review the
selected original BMP, and "BINPreview" to see the converted
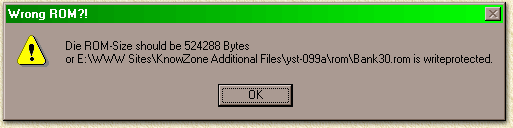
result (MPEG2-format). Note: Do not use the "Close Window" cross when using "Preview", it will close the program ! Simply click on the image shown. Step 4; Insert the image in the ROM file Now you can select the rom file you want the picture to be inserted to by pressing the "..." button. Before you do so, make sure the ROM file is NOT set to READ-ONLY. If the file is read-only an error will ocure as shown below:
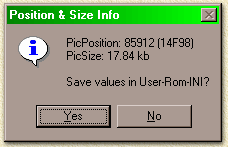
It might happen that the firmware you are using is not
yet analyzed by YST. YST needs this to locate the start-position in the
rom-file of the current image, so it knows where to put the new image
without damaging the actual rom-code. My first attempt confused me too,
since there is no additional information, like a readme.txt, that explains
what is going wrong. After a few seconds a requester will popup asking you
to save the values in the INI file.
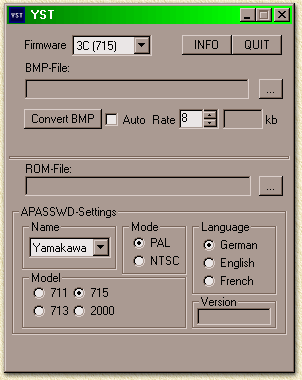
Select "Yes" so the value is saved for future use. Now set your preferences for "Name" (Yamakawa), "Model" (715), "Mode" (PAL) and "Language" (English).
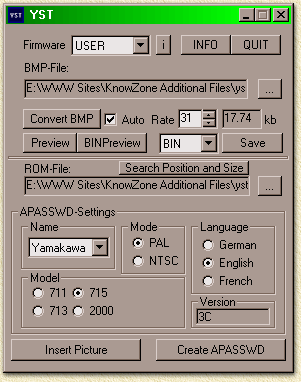
You can ignore the "3C" in the "Version" field in the lower right corner if you used the "Search Position and Size" button. Maybe in a future version this value will be updated automatically ... who knows ... Click now the "Insert Picture" button. A message (shown below) confirms the succesfull insertion of the image:
Now you're almost finished. The ROM file is ready for use, we still need to change the "APASSWD" file. Step 5; Adapt "Apasswd" file We still need to adapt the "apasswd" file, use "Create APASSWD" to do so. The "apasswd" file, that came with the rom file will be altered for this purpose ! If you want more information, then please take a look at the Yamakawa Update Firmware page, section "Edit password file".
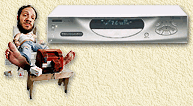
Step 6; Update firmware Please take a look at the Yamakawa Firmware Update page on how to use these rom and apasswd files. The result After updating the firmware, my Yamakawa now boots using my own image:
|
||||