|

| Print this page - use Landscape |
Search the WeetHet Pages |
|||||||
| WeetHet is being updated! - Current articles will slowly move to www.tweaking4all.com For excellent webhosting that is reliable and affordable, we highly recommend: LiquidWeb |
||||||||
|
On this page ...
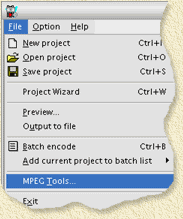
Before we start ... what do we need? Well, naturally at least a MPEG-1 or MPEG-2 file. Note: TMPGEnc supports transcoding to a different format - the result is not always perfect and it takes a lot of time ... You will also need, naturally, TMPGEnc, which you can download at the TMPGEnc Website. You can download a free version at their website - it doesn't support MPEG2, for that you will need to buy the Pro version (I do think it does support MPEG2 for a limited time). Install the the Application before continuing. Cutting a movies into pieces In this example I assume we have one MPEG-2 file, which we would like to cut into two pieces. Note: we're not actually "cutting" the movie into pieces. It's more that we make two or more copies of a part of a movie. Step 1: Start TMPGEnc We use TMPGEnc Plus in this example since we are dealing with MPEG-2 files. MPEG-1 files work in the same fashion.
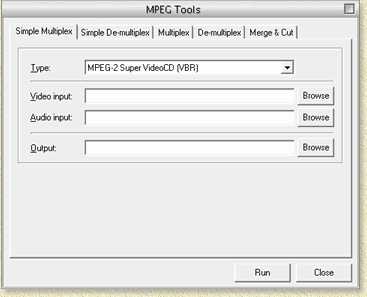
Now this window (the MPEG-Tools) appears:
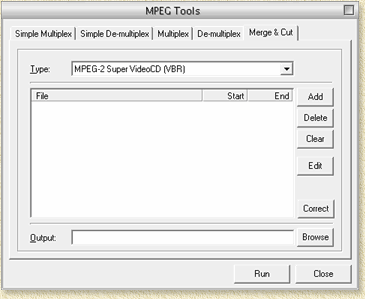
Step 3: Goto the "Merge & Cut" tab Click the most right tab, called "Merge & Cut". In the field "Type" you must set the proper file format (e.g. MPEG1, MPEG2, VideoCD, Super VideoCD, etc).
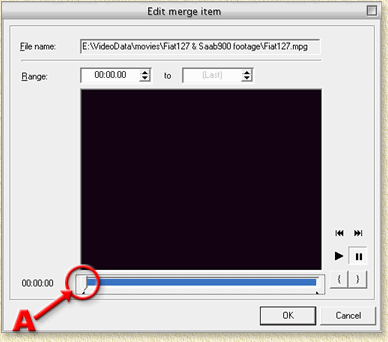
Step 4: Open the movie (MPEG) file Click the "Add" button to add a movie. A file dialog will open and ask you which MPEG file you would like to add. Pick a file and click "OK". Step 5: Goto Edit mode. Click the file you just added in the center file list (it will highlite) and click the "Edit" button. A window will now open showing you a "movie" screen. Step 6: Select the start position of the movie clip Use the slider (indicated below by the red A-arrow in the screenshot below) to select your starting position (usually this is the absolute beginning of the movie, but this can be any given position you like). Optionally, you can enter the start position manually in the "Range:" fields, where the first field inidicates the start position. If you have positioned the slider on the right place, click the accolade open button ('{') to fix the start position.
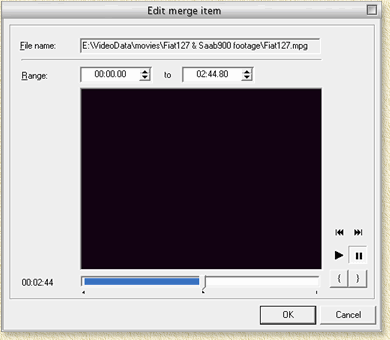
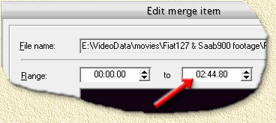
Step 7: Move the slider to the end position of the movie clip The same slider we used in Step 6 is now used to mark the end position of the first part to be cut from this movie. Optionally, you can enter the end position manually in the "Range:" fields, where the second (to) field inidicates the end position of this cut. Once you've found the position where you would like to end, press the accolade close button ('}').
Step 8: [OPTIONAL] Write down the time code (only needed if you want to cut a movie into multiple parts!)
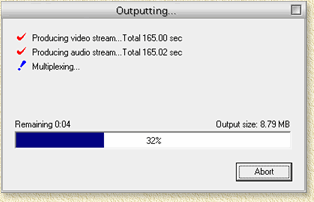
Step 9: Saving the result. Now it's time to copy this movie clip to a file. Click "OK" to leave this "movie" window and return to the "Merge & Cut" window. In the "Output" field (below the file list) you can either enter a filename manually or click the "Browse" button to locate a good place to store the mpeg cut. The original file will not be affected, but it is a good practice to name it something like "MyMovie_part1.mpg" (where "MyMovie" can be any title you like). The next step is to click the "Run" button. A window will appear showing the progress ...
When the new clip has been completed, you will be brought back to the "Merge & Cut" window. Step 10: The next CUT ... If you started cutting the movie to get multiple parts, then repeat Step 6 to Step 9 until you're done cutting the movie. For Step 6, use the END time (you did write it down in Step 8, didn't you?) of the previous cut as a BEGIN time. Tip: When creating a movie that spans multiple disc, it might be pleasant for the viewer to see the last few seconds of the previous movie clip being repeated on the next disc (for example when swapping disc usign VideoCD or Super VideoCD). |
||||||||