|

| Print this page - use Landscape |
Search the WeetHet Pages |
|||
| WeetHet is being updated! - Current articles will slowly move to www.tweaking4all.com For excellent webhosting that is reliable and affordable, we highly recommend: LiquidWeb |
||||
|
On this page...
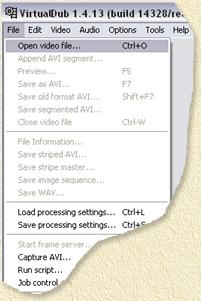
How to cut an AVI file For cutting a movie we will use VirtualDub. You can download the most recent version at the VirtualDub website. The current version of VirtualDub is pretty easy to install: Unzip the archive (ZIP file) using WinRar or WinZip to a folder. Usually, I copy this entire folder to C:\Program Files and make a shortcut to VIRTUALDUB.EXE (there is a special Pentium 4 version, this one needs to be downloaded and added to the content of the VirtualDub folder, the filename of the Pentium 4 version is VEEDUBP4.EXE!). After installing VirtualDub, you can start the application. Example 1: Cut the credits This first example shows you how to cut away the end credits of a movie. First open the AVI file using the menu "File" - "Open video file..." (or press CTRL+O).
A file dialog will appear. Using this dialog, browse to the AVI file you want to make shorter, select it and open it. VirtualDub will now show this window;
The basic approach here is to select the part that we want to have. This means that the part we select will become the content of our new AVI file. If you want to cut only the credits, then the first frame of the AVI will remain the first frame. Click the "Mark In"
button ( In case you're not sure if the indicator is at the beginning of the slider as shown below (red arrow points to the slider):
The next step will be determination of
the end point within the AVI, which we mark with the "Mark
Out" button ( You can use the slider to determine the
proper position. I usually move the slider way to the right and slowly
move it to the left up until the point where I start seeing the movie
instead of credits. Then I start moving the slider to right again, using
the "Key next" button ( Once we found the end position, we can
click the "Mark Out" button (
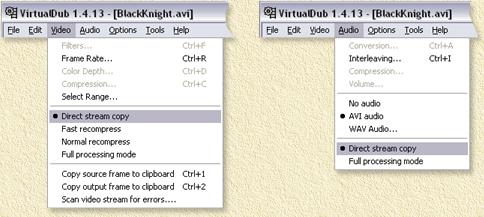
You will notice on the slider bar that a gray bar will appear between the mark-in and mark-out points. This indicates that this is the piece that we want to keep. Now we need to do some settings on how VirtualDub should copy this. Since we only want to remove the end of this move and do not intend to change compression or anything else, we need to tell VirtualDub to do so. First choose from the "Video" menu, the option "Direct Stream Copy". We do the same for the "Audio" menu, also select "Direct Stream Copy".
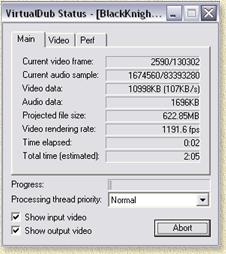
Once we have done that, we can choose from the "File" menu, the option "Save as AVI" or simply press F7. VirtualDub will now start saving the selected scene, a dialog will keep you informed on it's progress:
Once that is completed, you're done. It's not a bad idea to test the result afterwards. Example 2: Split a movie into two parts This is commonly used when an AVI file needs two (or more) CD's space wise. Basically we repeat the first example, the only difference is that for the first cut, our ending position will be (when cutting it into two parts) the middle of the movie.
The rest will remains the same; set "Audio" and "Video" to "Direct Stream Copy" and use "File" - "Save as AVI" to save the first part. After VirtualDub
completed this, we must select the second part. This is done pretty simple,
as the slider is still positioned at the end of the previously marked
scene. Simple click the "Mark In" button ( Tip: Consider
moving the slider a little bit to the left, so there will be a little
overlap when switching CD's. Don't forget to press the "Mark
In" button (
Now move the slider to the end of the move
and press the "Mark Out" button ( Pretty easy he? |
||||