| Print this page - use Landscape |
Search the WeetHet Pages |
|||||||
| WeetHet is being updated! - Current articles will slowly move to www.tweaking4all.com For excellent webhosting that is reliable and affordable, we highly recommend: LiquidWeb |
||||||||
|
On this page ...
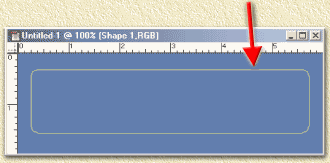
Tutorial 1. Start a new image (Menu: "File" - "New"). Use a working space that gives you a little room to play around. I usually take a larger window, for example 640x480, but for a small button the window does not need to be that big. The background color of this newly opened window should match the future color of your button. In our example we use blue. Note: in this example we asume that you're about to create two images for each button. This is usefull if you are about to create a button with a rool-over effect. If you're not familiar with this technique, you will need only one image for your button. However there will be no rollover effect possible on your website. 2. Create the first layer. First create a new layer (menu: "Layer" - "New" - "Layer..." , or press Shift + CTRL + N). Tip: It is a good idea to label this layer. 3. Draw you basic button shape. Use the shape tool to create the basic shape of your button. Make it a size that is comfortable working with to be reduced later.
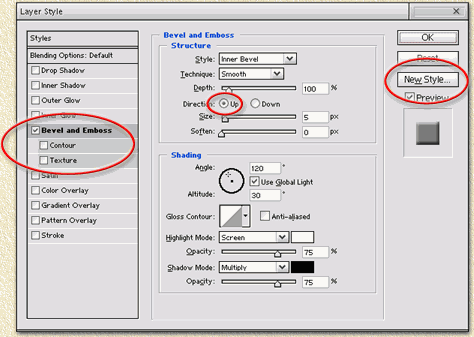
4. Add a layer effect. Double-click the Layer (Note:
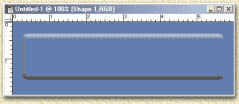
as of Photosop 7, you will need to click the Click Bevel/Emboss and play until it looks cool! Save this as a new style giving it a unique obvious name. Notice the default is UP position of the Bevel. This will be the base of all your buttons in the UP position. I used the Chisel Hard for this example.
We're trying to get something as shown below:
5. Duplicate the layer. DUPLICATE the layer naming it "UP" (for example). This is done by right clicking the layer and selecting the option "Duplicate". Click the eye in the Layers Palette turning off the previous layer. Now the New Layer is the only one showing.
Double click this layer to open the Effects Dialgue (Note:
as of Photosop 7, you will need to click the Click the "down" effect in the "Bevel and Emboss" screen, after doing that name that style. This will be the DOWN style part for all ALL Buttons. I reduced the Opacity to 50% for additional effect. 6. Adding text. Naturally, a button should either have an icon and/or text on it, in order to identify it's purpose. We will work with text for this example.
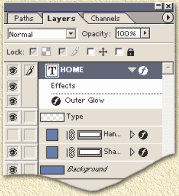
This file can be used for all the buttons for consistency in size. You can either choose to use this file for all buttons (ie. adding more text layers, turning them ON and OFF. When suing ULead Smartsaver you do not need to flatten the image. If you decide to use Photosop's buildin GIF saving routine, then you will need to create duplicates of the UP and DOWN layers and flatten that layer - it's advisable to work with a copy of the file, as you may accidentally destroy some of your work. Keep in mind though that there is an undo option in Photoshop using CTRL+Z and/or ALT_CTRL+Z. After all the buttons are done the routine of turning ON/OFF the appropriate layers Save As each Button State. Reopen each file and Flatten the Layers and Resave as a .gif or .jpg. A GIF is a good format for animation in ImageReady. This program comes with Photoshop 6.0. It extends the abilities of artists into animation. Sounds invoved? It is. That is why either we are all nuts or mad or on the other hand love what we do. Best Regards, Tip: the sample button file for Photoshop can be downloaded here. |
||||||||

