|
On this page...
|
Nero Burning ROM by Ahead
is a versatile piece of software. It allows you to create Super
VideoCD's with navigation menu's as well.
In this short guide I'll show you how to create your own Super
VideoCD, which you can playback on your PC and on most standalone
DVD-players.
Before you start you will need to have a proper MPEG-2
file (see formats for details) which
you want to put on the Super VideoCD. Nero does support other MPEG
and AVI formats but needs to convert these files to MPEG2 and usually
the result is not that great.
Note: Not all standalone DVD-player support
Super VideoCD!
Tip: It is also possible to add images
(like digital photo's) to your Super VideoCD!
Note: When
using K(S)VCD templates, make sure to remove the check box
at "Create standard compliant CD"!!!!!!
Note: Read the disclaimer
first! |
|
Page overview
Step 1: Have the proper MPEG2
file ready
You will, naturally, need the movie file or files (you
can put multiple movies or parts of movies on one Super VideoCD). The
MPEG-2 should match the standard you want to target, ie. PAL or NTSC.
Preferably use PAL since the resolution of a PAL movie is slightly better
than that of a NTSC movie and most stand-alone players seem to be able
to playback PAL and NTSC mixed anyway without any trouble.
Make sure you test this first with your DVD player!
In this test you can also see if your standalone player can handle CDR
and/or CDRW discs. Some older DVD players cannot read CD-Recordables,
instead try a CD-ReWritable disc since the laser reflection of these discs
almost matches that of a regular DVD.
In short;
Resolution |
480 x 576 |
Framerate |
25 fps |
Video
bitrate |
max 2600 Kbps |
Audio
bitrate |
224 Kbps |
|
|
Resolution |
480 x 480 |
Framerate |
29.97 fps |
Video
bitrate |
max 2600 Kbps |
Audio
bitrate |
224 Kbps |
Make you choice now and remember the info of these tables
above.
Note: Audiobitrate is not
fixed to 224 kbps, however it is advisable to use this format. Lower bitrates
take less space but quality is poor. Higher bitrates renders better sound
quality but some DVD players might experience trouble with these VCD's
... if you have to select a higher quality, the go for 320 Kbps.
Step 2: Proper settings in Nero
OK, now we have the movie file, we will start Nero.
Nero usually starts either with the Wizard
window or with the "New compilation" window.
In case the wizard starts:
click the "Close Wizard" window so Nero
will bring you to the "New Compilation" window.
In case neither windows appear:
either select "File" from the menu and choose
"New..." or click the "New Compilation"
button ( ). ).
In the "New
Compilation" window we now select the "Super
Video CD" icon as shown here on the right, which will
open the options for our new VideoCD.
Note:
For the rest of this tutorial I'm assuming you're about to make
a PAL VideoCD. The only differences with an NTSC VideoCD is the
option "NTSC" instead of "PAL"
and the MPEG2 movie format used as mentioned above.
Note:
Click the tab "Video CD"
if this is not the currently displayed tab. |
 |
For you're first VideoCD I'd like to suggest
to use the settings as seen above. NTSC users might want
to check NTSC instead of PAL.
| Creat standard compliant CD |
Verifies that your VideoCD will be conforming
the standard specification. |
checked |
| Encoding bitrate |
Here Nero "plays" with the audio
bitrate (transcoding done by Nero) to get the file to fit the CDR
or CDRW. I never changed it and it always worked just fine. |
Try to fit disk size |
| Encoding resolution |
Specify the format being either PAL (for
example in Europe) or NTSC (USA). It kind-a depends on the movie source
file your using. I usually play the MPEG file using PowerDVD to see
what format it's in. Please match this settings with the format used
in the MPEG1 file. |
PAL |
| Store source pictures in |
This is of use when creating a VideoCD based
on digital photo's. The purpose here is to store the original images
(in a higher quality) in a seperate folder. For a movie based VideoCD
we do not need this. |
not checked |
Now
go to the next tab, called "Menu".
Since we are about to create a Super VideoCD with
menu's, please check the option "Enable menu".
The fields in more detail:
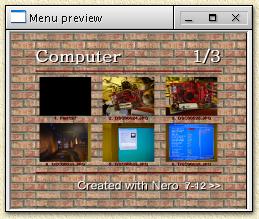
| Tip:
first you might want to check the "Preview first page"
option. It shows a little window with a preview of the menu (changes
are implemented right away!). This window is sizeable so you can see
a bit more of the details. |
 |
| Enable menu |
Enable or disable the menu. |
| Layout |
Here we can define how Nero should layout
the menu. Either using text (titles) or thumbnails. Examples are shown
below. |
| Header line |
Enable or disable the horizontal line
above the titles or thumbnails. |
| Footer line |
Enable or disable the horizontal line just
below the titles or thumbnails. |
| Background picture |
Here you can indicate what image you wish
to use as a background. If you don't enter anything here, the background
will by default be black, You can change that color by clicking the
little black square next to the "Browse..."
button. |
| Background mode |
Here we set the options on how Nero should
use the background image:
- Centered, original dimensions ("center")
- stretched ("maximize") without maintaining
the aspect ratio
- stretched and clipped to create fully filled screen ("scale
and clip" )
- stretched without clipping ("scale and fit")
- or use the image as a pattern ("tile")
|
| Header text |
Here you can enter the page title. You
can leave it empty if you don't want a title.
The button "Font" allows you to choose
font, style and color. The option "shadow"
creates a shadow behind the text. When activating this option, a little
black square appears allowing you to set a different color for the
shadow. |
| Footer text |
Here you can enter the footer text. You
can leave it empty if you don't want a title.
The button "Font" allows you to choose
font, style and color. The option "shadow"
creates a shadow behind the text. When activating this option, a little
black square appears allowing you to set a different color for the
shadow. |
| Items text |
This option allows you to set font, style
and color (note that the color settings influences the color of the
horizontal lines as well!) vof the titles of the menu items. Here
you can activate the use of shadow as well - the shadow will also
be applied to the thumbnails and the horizontal lines. |
| Links text |
Here we set font, style and color for the
indicator in the lower right corner showing the user that there are
more menu pages. The shadow thing works as with the previous items. |
| Set as default |
Allows you to make Nero save these settings
so the next new Super VideoCD will be started out with the same settings
- ideal when you are creating a serie of Super VideoCD's.. |
| Preview first page |
Allows you to preview the menu. |
Nero has 9 menu variants, which can be
set at the "Layout" dropdown box:
Note:
You can also create a Super VideoCD without a menu, see "CDRW
- Super VideoCD's with Nero" for details.
Click the tab "ISO".
Verify that only these options are checked (this is the default setting):
- ISO Level2 (Max. of 31 chars)
- ISO 9660
- Allow pathdepth of more than 8 directories
- Allow more than 255 characters in path
NO other option should be checked!
Now we go to the tab "Label".
In the field "Volume label" we can now
enter the title of our Super VideoCD. Usually it's a straight forward
name.
Tip: If a movie spans multiple
VideoCDs I usually end the title with "_AOFB"
where A equals the disc number in the sequence and B
equals the number of discs in this set.
Note:
In the volume label, special characters like "/", "\"
and a space are not allowed. It is common practice to use an underscore
("_") as a replacement of the space character.
Dates can optionally be set at
the "Dates" tab.
I usually set the date here to "Use current date and time"
for my personal reference, however the default setting will do just fine.
Alternatively you can enter a specific date indicating for example that
this is the movie of your holiday of June 2001.
At the "Misc"
tab we do not need to set anything.
The "Burn"
tab is not an issue right now either.
Finally click the "New" button.
Step 3: Adding files.
After we clicked the "New"
button, this compilation windows will appear.
Use drag and drop to place a movie file (MPEG2, either
with MPG or MPEG file extension) as shown below. Drag and drop can be
used with the buildin explorer of Nero or using the Windows Explorer (by
draging a file from the Windows Explorer to Nero).
Note: Other formats are supported
as well - Nero will transcode/convert these files. Just ckeep in mind
that the quality might be disappointing!
For those unfamiliar with drag and drop:
In the right pane you click through the discs of your computer as you
would do with the Windows Explorer. When you finally found the file or
files you want to add, use the left mouse button to select that particular
file and keep the left mouse button pressed. Now move your mouse until
is is positioned over the pane part pointed with the red arrow in the
screenshot below. Once the mouse is at that position, you can release
the mouse button and Nero will add the file.
You can add as many movieparts as you like. The order
shown in the window pointed by the red arrow as seen in the screenshot
above, will be the playback order of your movies. You can change the order
using drag and drop within this little window.
When you dragged a illegal video file format to the
track section, you will get an error message:
This error leaves us with three options:
- 1. Ignore it: Turn off standard compliance
and continue
Not advisable, but then again most DVD players seem to be able to handle
VCD's that are not 100% Super VideoCD compliant.
- 2. Re-encode the video file
Also not advisable.
The buildin transcoder can convert the file (not the orginal one) to
the proper VideoCD specifications. Yes even a DivX will be transcoded
to MPEG-2.
Warning: The QUALITY of this transcoded file
might be rather poor!
- 3. Do not add this file: Cancel
This is what I would do and use some tool to transcode it to the proper
format.
A proper tutorial on this subject will follow soon.
Note that the capacity of
a CD is limited - the amount of space used is visable in the bar at the
bottom of the Nero window, in this screenshot we used about 50 Mb's of
movie data:

Tip:
A Super VideoCD can hold more data on a CD than a regular CDRom. This
is due to the different level of error correction. A 80 minute CDR can
hold app. 810 Mb of VideoCD data. So the indicators (the yellow and red
dotted lines in the progress bar) are not indicating the proper capacity.
Corrections
on the menu
Sometimes it can be usefull to do some
corrections on the menu as it has been created by Nero. For example: to
change the fact that a menu automatically continues to the next menu after
5 seconds.
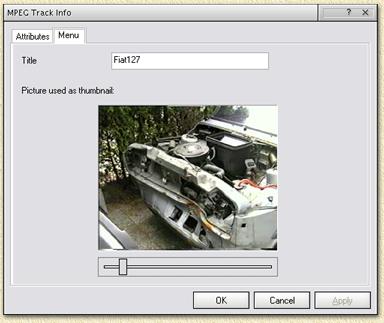
In the window holding the tracks of your
Super VideoCD, you will see both movies (for example here "Fiat127")
and menu's ("Menu page 1" as seen below):
Click such an item with the right mouse
button and select the option "Properties" from
the popup menu.
- For menu pages;
We can set the "pause" time before the menu continues to the
next menu page. At "Pause after Track" one
can choose "Infinite", where the menu does
not continue to the next menu unless the user tells him to do so, or
a specified number of "Seconds".
- With movies;
We can set the "pause" time before the playback continues
with the next movie. At "Pause after Track"
one can choose "Infinite", where playback
does not continue to the next movie unless the user tells him to do
so, or a specified number of "Seconds".
The tab "Menu" allows you to change the title
and also the thumbnail image used for this item.
Step 4: Burning the Super VideoCD
OK, now we've made our compilation, it's time to burn
that puppy.
Click the "Burn" icon ( )
or click in the "File" menu, the option "Write
CD ...". )
or click in the "File" menu, the option "Write
CD ...".
The "New compilation" window
appears again, this time showing the "Burn"
tab.
Here you can choose to simulate and test the writing proces but if you
have done this before I'd go for these options:
- "Write"
- "Finalize CD (No further writing possible!)"
- "Write Speed" set to maximum
- "Write method" set to
"Disc-at-once" (not all CD-writers support
this - in that case select "Track-at-once")
- "Number of copies" set
to "1" unless you want more copies
- Activate "Burnproof" or
"Exalink" if available (not all writers support
this)
Finally click the "Write"
button and wait for the CD to complete.
After the CD has been completely burned, you can try
it on your PC using (for example) PowerDVD, or play it on your standalone
DVD player to see if it all works.
Note:
For playback on a PC you MUST have a software DVD-player
like PowerDVD - Windows Media Player will playback MPEG2 files, unless
you have a software DVD-player installed.
The MPEG2 files can be found in the folder "MPEG2"
of your Super VideoCD and the first file is usually called "AVSEQ01.MPG".
|
